Your first NodeBook
💡 Pro Tip:
Start with the big picture. Add four or five main topics first, then go into each one and fill it in.
Where you start
After you log in, you see your NodeBook. A new account starts with one node in the middle of the canvas: My Workspace. This is the top of your NodeBook. Everything you add will sit somewhere under it.
1. Switch to Edit
Click Edit in the top bar, next to Read. Edit brings out the tools for building: the + and ⋯ buttons that appear when you point at a node, and the formatting toolbar inside tabs.
2. Rename the central node
Give the top of your NodeBook a name that fits, such as your course or project.
- Point at My Workspace and click ⋯ (More node actions).
- Click Rename, type the new name and press Enter.
3. Add your first topics
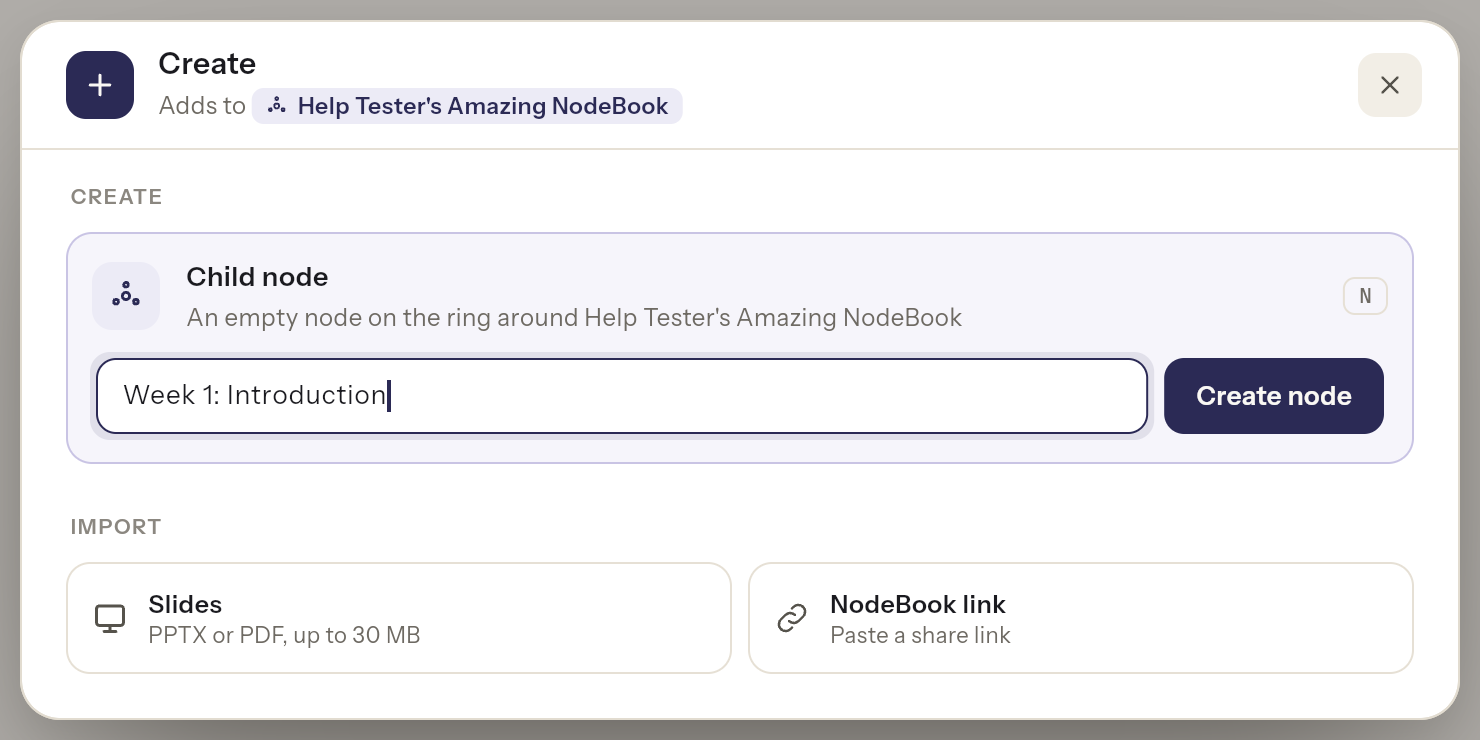
- Click New in the top bar. The Create window opens.
- Under Child node, type a title in Node title.
- Click Create node.
The new node appears on the ring around the central node. Repeat for each main topic. You can also point at a node and click + (Add child node), or press N.
4. Write your first tab
Content lives in tabs inside a node.
- Click the central node to open its content.
- With the content open, click New and choose Tab in this node.
- Type a Tab title, for example Overview, and click Add tab.
- Click into the tab and start writing.
Every change is saved as you type. The top bar shows Saving… and then Saved.
5. Go one level deeper
Click one of your new topics. It moves to the centre, and you can add child nodes and tabs to it the same way.
To go back, click a higher level in the node path in the top bar, or click ⌂ to return to the top.
Next steps
Was this article helpful?