Add images
2 min readUpdated 9 days agoBy NodeBook Team
Add an image
- In Edit mode, put the cursor where the image should go.
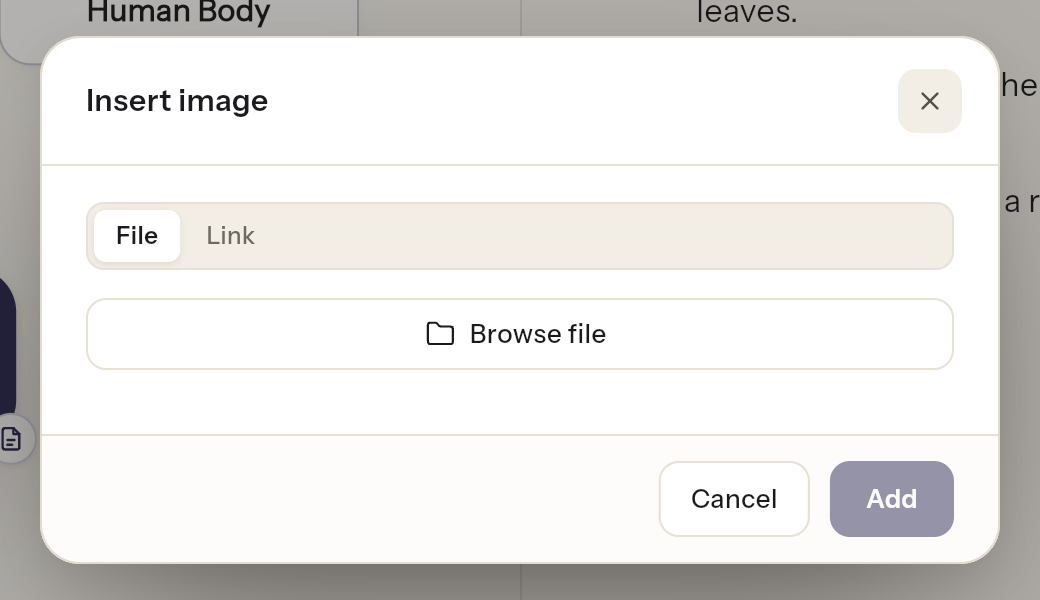
- Click Insert image in the toolbar.
- Choose where it comes from:
- File: click Browse file and pick an image from your device.
- Link: paste the image's address under Paste a link and click Fetch.
- Set the Alignment (Left, Center or Right) and the Size, from 10% to 100% of the tab's width.
- Click Add.
Images from a link are copied into NodeBook, so they keep working even if the original page changes or disappears.
Files can be up to 50 MB.
Paste an image
Copied an image or a screenshot? Click Paste copied image in the toolbar to drop it straight into the tab.
Change or remove an image
Click ⋮ beside the image:
- Edit: changes its size or alignment.
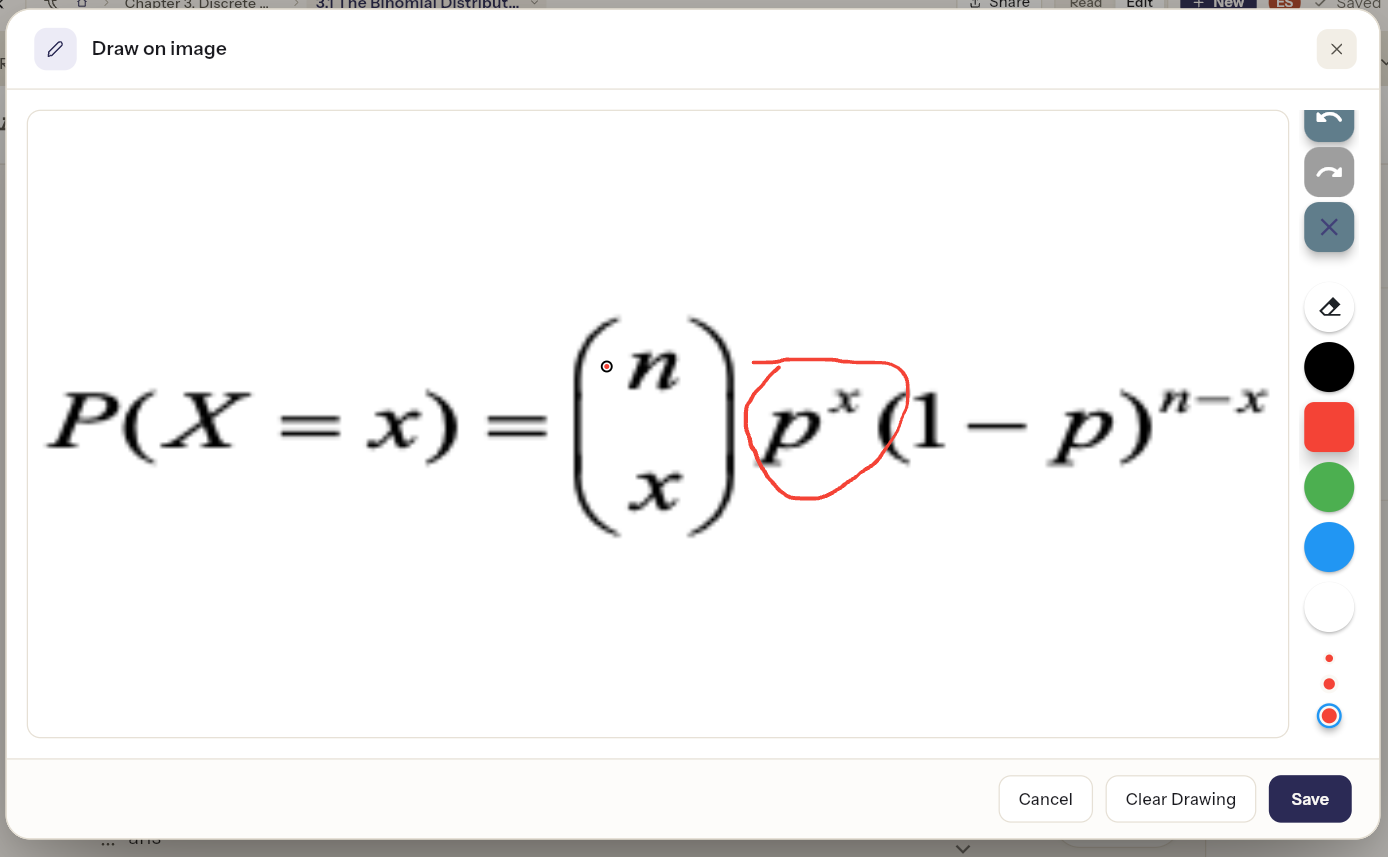
- Draw on image: opens it in a drawing window, to circle, label or annotate it.
- Copy, Paste, Move Up, Move Down, Delete.
- Make it collapsible or Add to collapsible: see Collapsible sections.
If an image doesn't load
If you see This image couldn't load, check your connection and reload the tab.
Was this article helpful?